【Angular】TSLintからESLint+Prettierに移行する手順!

 いずみ
いずみこんな悩みを解決できる記事を書きました!
僕は現役フリーランスエンジニア(歴10年)で、資格は13個保有しています。
「AngularでTSLintからESLint+Prettierに移行したい」とお考えではありませんか?
Angularが古いバージョンだとTSLintがデフォルトでしたが、TSLintは非推奨になったのでESLintに移行する必要があります。


手順自体は非常に簡単なので、面倒がらずにサクッと移行しちゃいましょう(笑)


本記事を読めば、AngularでTSLintからESLint+Prettierに移行する手順が分かるので早速見ていきましょう!


すぐ読み終わるので、ぜひ最後まで読んでくださいね♪
| 【当サイト】おすすめフリーランスエージェント3選 | |||
|---|---|---|---|
| エージェント | 評価 | ポイント | 公式サイト |
レバテックフリーランス | 5.0 | 業界最大級のエージェント。 高単価案件が豊富。 | 公式 |
Midworks | 4.8 | 満足度調査で 3年連続3冠を達成。 | 公式 |
ITプロパートナーズ | 4.6 | 週2〜3向けの案件が豊富。 | 公式 |
前提
- Angular:14
TSLintからESLint+Prettierに移行する手順
早速ですが、TSLintからESLint+Prettierに移行する手順を解説します。
$ ng add @angular-eslint/schematics

// Angular14の場合
$ ng add @angular-eslint/schematics@14

ℹ️ Using package manager: npm
✔️ Package information loaded.

The package @angular-eslint/schematics@14 will be installed and executed.
Would you like to proceed? Yes
✔️ Packages successfully installed.

    All @angular-eslint dependencies have been successfully installed 🎉

    Please see https://github.com/angular-eslint/angular-eslint for how to add ESLint configuration to your project.

UPDATE package.json (2041 bytes)
✔️ Packages installed successfully.
ESLintをインストールします。
$ ng g @angular-eslint/schematics:convert-tslint-to-eslint {{YOUR_PROJECT_NAME_GOES_HERE}}

? Would you like to remove TSLint and its related config if there are no TSLint projects remaining after this conversion? Yes
? Would you like to ignore the existing TSLint config? Recommended if the TSLint config has not been altered much as it makes the new ESLint config cleaner. Yes

    INFO: We are now installing the "tslint-to-eslint-config" package into a tmp directory to aid with the conversion

    This may take a minute or two...

CREATE .eslintrc.json (1015 bytes)
UPDATE angular.json (7241 bytes)
TSLintがインストールされている場合はアンインストールします。


上記コマンドを実行すると「.eslintrc.json」というファイルが作成されます。
ちなみに、「Codelyzer」というライブラリや「tslint.json」も不要なので削除しちゃいましょう。
$ ng lintlintが実行されればOKです。
$ npm install --save-dev prettier eslint-plugin-prettier eslint-config-prettierPrettierをインストールします。
{
  "overrides": [
    {
      "files": "*.html",
      "options": {
        "parser": "angular"
      }
    }
  ]
}こちらを参考に、.prettierrcを作成します。
{
  "root": true,
  "ignorePatterns": ["projects/**/*"],
  "overrides": [
    {
      "files": ["*.ts"],
      "extends": [
        "eslint:recommended",
        "plugin:@typescript-eslint/recommended",
        "plugin:@angular-eslint/recommended",
        "plugin:@angular-eslint/template/process-inline-templates",
        "plugin:prettier/recommended" // <--- 追加
      ],
      "rules": {}
    },
    {
      "files": ["*.html"],
      "extends": [
        "plugin:@angular-eslint/template/recommended",
        "plugin:prettier/recommended" // <--- 追加
      ],
      "rules": {}
    }
  ]
}こちらを参考に、.eslintrcにPrettierの設定を追記します。
$ ng lintlintが実行し、Prettierのチェックが実行されればOKです。
VSCodeにESLintの設定を行う手順
VSCodeを使用している場合は、ESLintを設定しておきましょう。


ESLintを設定すれば、ファイル保存時に自動でフォーマットを整えてくれます。


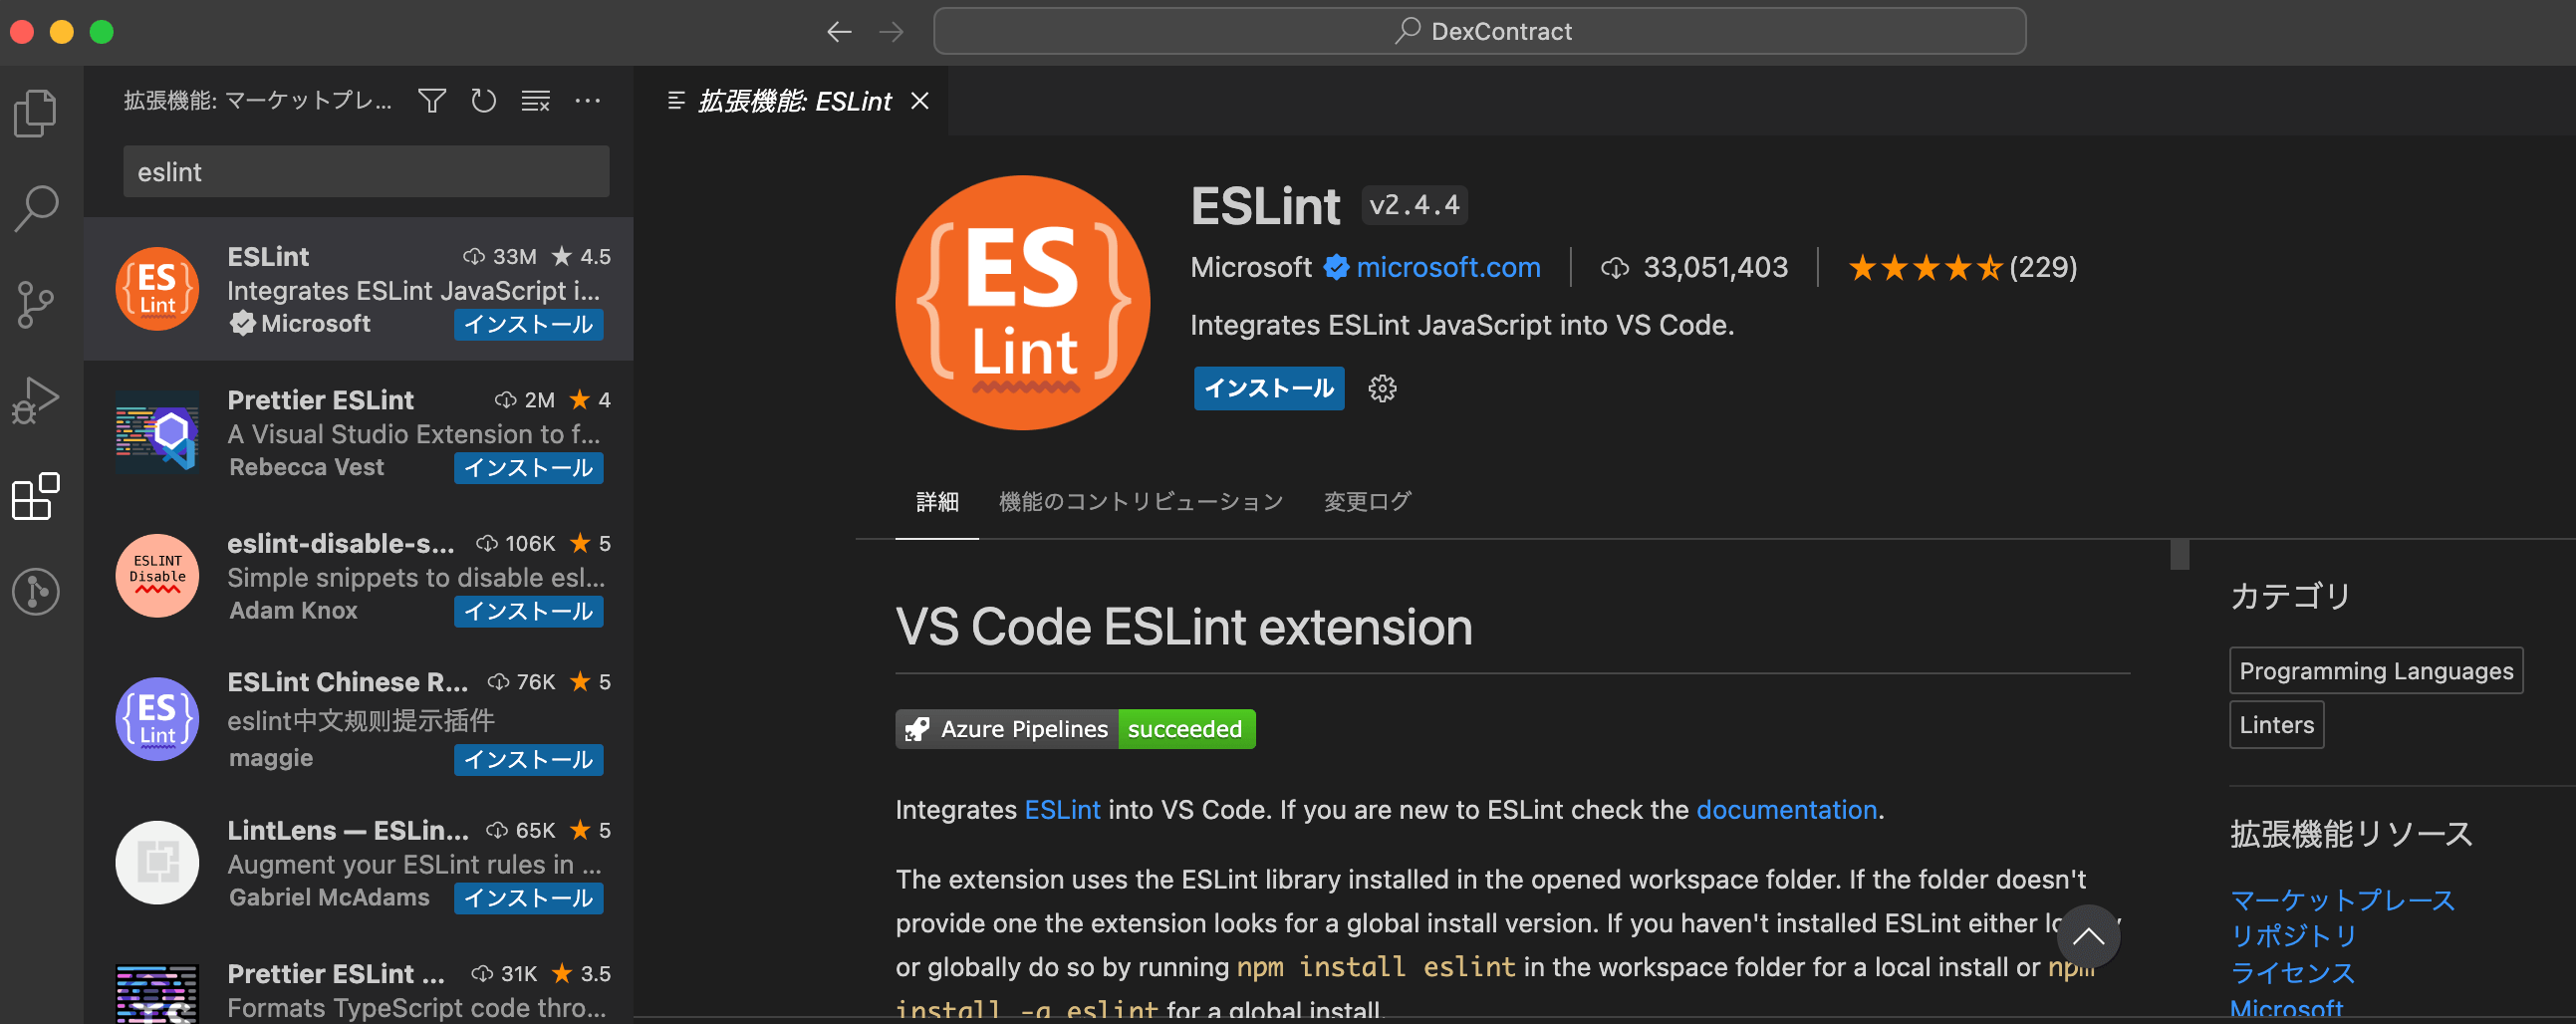
拡張機能の「ESLint」をインストールします。
{
  "eslint.options": {
    "extensions": [".ts", ".html"]
  },
  "eslint.validate": [
    "javascript",
    "javascriptreact",
    "typescript",
    "typescriptreact",
    "html"
  ],
  "editor.codeActionsOnSave": {
    "source.fixAll.eslint": true
  }
}
上記をsettings.jsonに記載すればOKです。


これでESLintの導入は完了です!
| 【当サイト】おすすめフリーランスエージェント3選 | |||
|---|---|---|---|
| エージェント | 評価 | ポイント | 公式サイト |
レバテックフリーランス | 5.0 | 業界最大級のエージェント。 高単価案件が豊富。 | 公式 |
Midworks | 4.8 | 満足度調査で 3年連続3冠を達成。 | 公式 |
ITプロパートナーズ | 4.6 | 週2〜3向けの案件が豊富。 | 公式 |
【厳選】フリーランスエンジニアにおすすめなエージェント3選


フリーランスエンジニアになるにはエージェントから案件をもらう必要があります。
僕が実際に利用しているおすすめエージェントを紹介しますね。


エージェントは必ず複数登録してください。
担当者によっては「全然案件紹介してくれない…」みたいなこともあるので…
僕は実際に5つのエージェントを使い回していますよ。
フリーランスを始めるなら「レバテックフリーランス


- 業界最大級の案件数。
- 業界トップクラスの高単価報酬、低マージン(平均年収862万円)。
- 案件参画中のフォローの充実。
※詳細は「【業界最大手】レバテックフリーランスとは?メリットや利用手順を解説!」を参照。
レバテックフリーランス
![]()
![]()
とにかく案件数が多いので、とりあえず登録しておけば間違いないエージェントです!


僕もはじめてフリーランスの案件を貰ったのはレバテックフリーランス
![]()
![]()
保有している案件数が多いので、業務経験がなくても何かしらの案件は紹介してもらえますよ(僕はJavaの経験3年でも案件を貰えました)。
手厚い保障を重視したいなら「Midworks


- 手厚い保障で正社員並みの安心感。
- 還元率60%超え&単価公開でクリアな契約。
- 給与保障制度(審査あり)。
Midworks
![]()
![]()
フリーランスを目指しているけど不安な方や保障を重視したい方におすすめです。


僕も何度か案件を紹介してもらいました。
自分のスキルに合った案件を紹介してもらえましたし、電話のやり取りも非常に丁寧でした。
週2〜3日の案件探しなら「ITプロパートナーズ


- IT案件に特化したフリーランスエージェント。
- 週2〜3日の案件が豊富。
- リモート案件が多く、直エンドなので単価も高い。
※詳細は「【週2・3案件】ITプロパートナーズとは?メリットや利用手順を解説!」を参照。
ITプロパートナーズ
![]()
![]()
週2〜3日から参画できる案件が豊富なので、起業したい人にもおすすめです。


週2〜3日の案件はある程度スキルがないと紹介してもらえない印象です。
とはいえ、週5の案件ももちろんありますし、僕が利用した時は迅速・丁寧に対応していただきました!
まとめ
今回は、AngularでTSLintからESLint+Prettierに移行する手順を解説しました。
以下が本記事のまとめになります。
- おすすめ本
Angularの勉強なら「Angularアプリケーションプログラミング


最後までお読みいただき、ありがとうございました!
| 【当サイト】おすすめフリーランスエージェント3選 | |||
|---|---|---|---|
| エージェント | 評価 | ポイント | 公式サイト |
レバテックフリーランス | 5.0 | 業界最大級のエージェント。 高単価案件が豊富。 | 公式 |
Midworks | 4.8 | 満足度調査で 3年連続3冠を達成。 | 公式 |
ITプロパートナーズ | 4.6 | 週2〜3向けの案件が豊富。 | 公式 |
- クソおすすめ本


海外のエンジニアがどういった思考で働いているかが理解できます。
海外に行く気はないけど海外エンジニアの動向が気になる雑魚エンジニアにおすすめです(本当におすすめな本しか紹介しないのでご安心を)。


