【超簡単】VagrantでPostgreSQL環境を構築する方法!

 いずみ
いずみこんな悩みを解決できる記事を書きました!
僕は現役フリーランスエンジニア(歴10年)で、資格は13個保有しています。
結論、VagrantでPostgreSQL環境を構築するのは非常に簡単です。


本記事を読めば、VagrantでPostgreSQL環境を構築する方法が理解できるので早速見ていきましょう!


すぐ読み終わるので、ぜひ最後まで読んでくださいね♪
| 【当サイト】おすすめフリーランスエージェント3選 | |||
|---|---|---|---|
| エージェント | 評価 | ポイント | 公式サイト |
レバテックフリーランス | 5.0 | 業界最大級のエージェント。 高単価案件が豊富。 | 公式 |
Midworks | 4.8 | 満足度調査で 3年連続3冠を達成。 | 公式 |
ITプロパートナーズ | 4.6 | 週2〜3向けの案件が豊富。 | 公式 |
VagrantでPostgreSQL環境を構築する手順
VagrantでPostgreSQL環境を構築する手順は以下の通りです。
- VagrantでCentOS環境を構築。
- Postgreをインストール。
- データベースを作成。
VagrantでPostgreSQL環境を構築する方法
では早速、環境構築をしていきましょう。


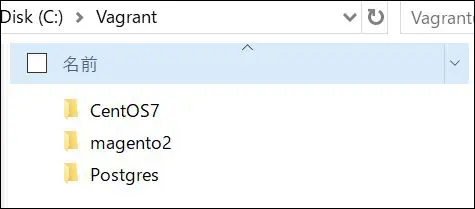
任意の場所にフォルダを作成します。
$ vagrant init centos/7先ほど作成したフォルダにVagrantファイルを作成します。
$ vagrant upVagrantを起動します。
$ vagrant sshSSHでログインします。
[vagrant@localhost ~]$ sudo yum install postgresql-serverPostgreをインストールします。
[vagrant@localhost ~]$ sudo service postgresql initdbデータベースを作成します。
[vagrant@localhost ~]$ sudo service postgresql startPostgreを起動します。
[vagrant@localhost ~]$ sudo chkconfig postgresql onPostgreの自動起動をONにします。
[vagrant@localhost ~]$ sudo -u postgres psqlpostgresユーザでPostgreにログインします。
[vagrant@localhost ~]$ sudo -u postgres createdb sampledbDBを作成します。
[vagrant@localhost ~]$ sudo -u postgres psql sampledb先ほど作成したsampledbにログインします。
sampledb=# create user vagrant;ユーザを作成します。
[vagrant@localhost ~]$ psql sampledbCentOSにログインしているユーザもvagrantなので、postgreへのログイン時にユーザ名を省略できます。
sampledb=# select usename from pg_user;
 usename
----------
 postgres
 vagrant
(2 rows)
ユーザを確認し、問題なければ環境構築は完了です。
| 【当サイト】おすすめフリーランスエージェント3選 | |||
|---|---|---|---|
| エージェント | 評価 | ポイント | 公式サイト |
レバテックフリーランス | 5.0 | 業界最大級のエージェント。 高単価案件が豊富。 | 公式 |
Midworks | 4.8 | 満足度調査で 3年連続3冠を達成。 | 公式 |
ITプロパートナーズ | 4.6 | 週2〜3向けの案件が豊富。 | 公式 |
【厳選】フリーランスエンジニアにおすすめなエージェント3選


フリーランスエンジニアになるにはエージェントから案件をもらう必要があります。
僕が実際に利用しているおすすめエージェントを紹介しますね。


エージェントは必ず複数登録してください。
担当者によっては「全然案件紹介してくれない…」みたいなこともあるので…
僕は実際に5つのエージェントを使い回していますよ。
フリーランスを始めるなら「レバテックフリーランス


- 業界最大級の案件数。
- 業界トップクラスの高単価報酬、低マージン(平均年収862万円)。
- 案件参画中のフォローの充実。
※詳細は「【業界最大手】レバテックフリーランスとは?メリットや利用手順を解説!」を参照。
レバテックフリーランス
![]()
![]()
とにかく案件数が多いので、とりあえず登録しておけば間違いないエージェントです!


僕もはじめてフリーランスの案件を貰ったのはレバテックフリーランス
![]()
![]()
保有している案件数が多いので、業務経験がなくても何かしらの案件は紹介してもらえますよ(僕はJavaの経験3年でも案件を貰えました)。
手厚い保障を重視したいなら「Midworks


- 手厚い保障で正社員並みの安心感。
- 還元率60%超え&単価公開でクリアな契約。
- 給与保障制度(審査あり)。
Midworks
![]()
![]()
フリーランスを目指しているけど不安な方や保障を重視したい方におすすめです。


僕も何度か案件を紹介してもらいました。
自分のスキルに合った案件を紹介してもらえましたし、電話のやり取りも非常に丁寧でした。
週2〜3日の案件探しなら「ITプロパートナーズ


- IT案件に特化したフリーランスエージェント。
- 週2〜3日の案件が豊富。
- リモート案件が多く、直エンドなので単価も高い。
※詳細は「【週2・3案件】ITプロパートナーズとは?メリットや利用手順を解説!」を参照。
ITプロパートナーズ
![]()
![]()
週2〜3日から参画できる案件が豊富なので、起業したい人にもおすすめです。


週2〜3日の案件はある程度スキルがないと紹介してもらえない印象です。
とはいえ、週5の案件ももちろんありますし、僕が利用した時は迅速・丁寧に対応していただきました!
まとめ
今回は、VagrantでPostgreSQL環境を構築する方法について解説しました。


最後までお読みいただき、ありがとうございました!
| 【当サイト】おすすめフリーランスエージェント3選 | |||
|---|---|---|---|
| エージェント | 評価 | ポイント | 公式サイト |
レバテックフリーランス | 5.0 | 業界最大級のエージェント。 高単価案件が豊富。 | 公式 |
Midworks | 4.8 | 満足度調査で 3年連続3冠を達成。 | 公式 |
ITプロパートナーズ | 4.6 | 週2〜3向けの案件が豊富。 | 公式 |
- クソおすすめ本


海外のエンジニアがどういった思考で働いているかが理解できます。
海外に行く気はないけど海外エンジニアの動向が気になる雑魚エンジニアにおすすめです(本当におすすめな本しか紹介しないのでご安心を)。


